Here I've written one of way to create a new AVD (Emulator) in Android Studio. You can use either this emulator where it's on a computer or your mobile phone to test your developed mobile applications.
But if you decided to use the emulator in your computer below requirements must. Otherwise, say good-bye to your computer probably.
I mean, it'll able to break your computer. Because it also performs all the functionalities what in your hand device performs. If your phone has 4 GB RAM, then definitely the emulator also needs that much to work softly.
Minimum Requirements for the AVD:
RAM: 2 GB - 4 GB (Recommended)
Disk Space: 400 MB (will change according to installed apps to the emulator)
- Configure
- AVD Manager
- + Create a Virtual Device
- Choose a suitable device
- Next
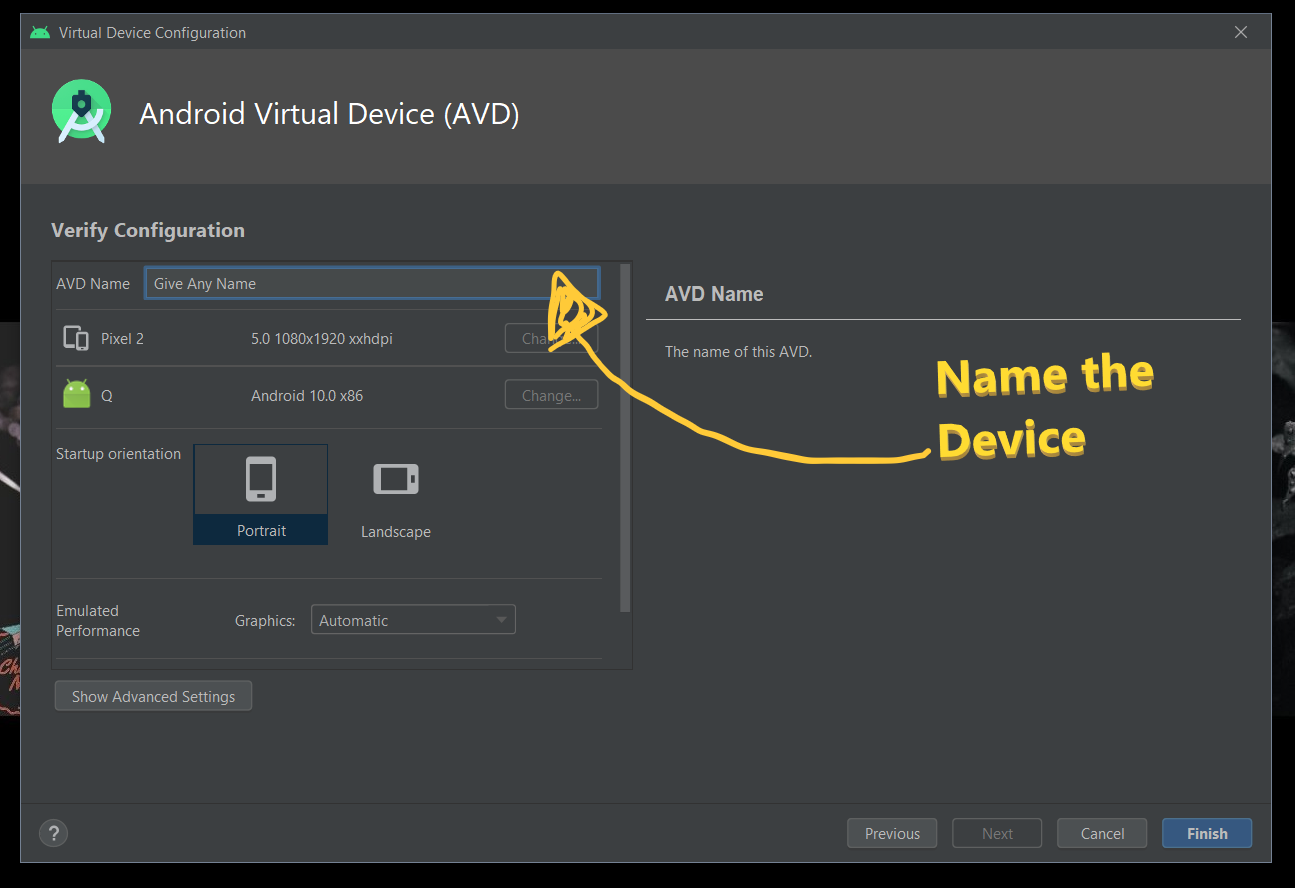
- Give a name for the device
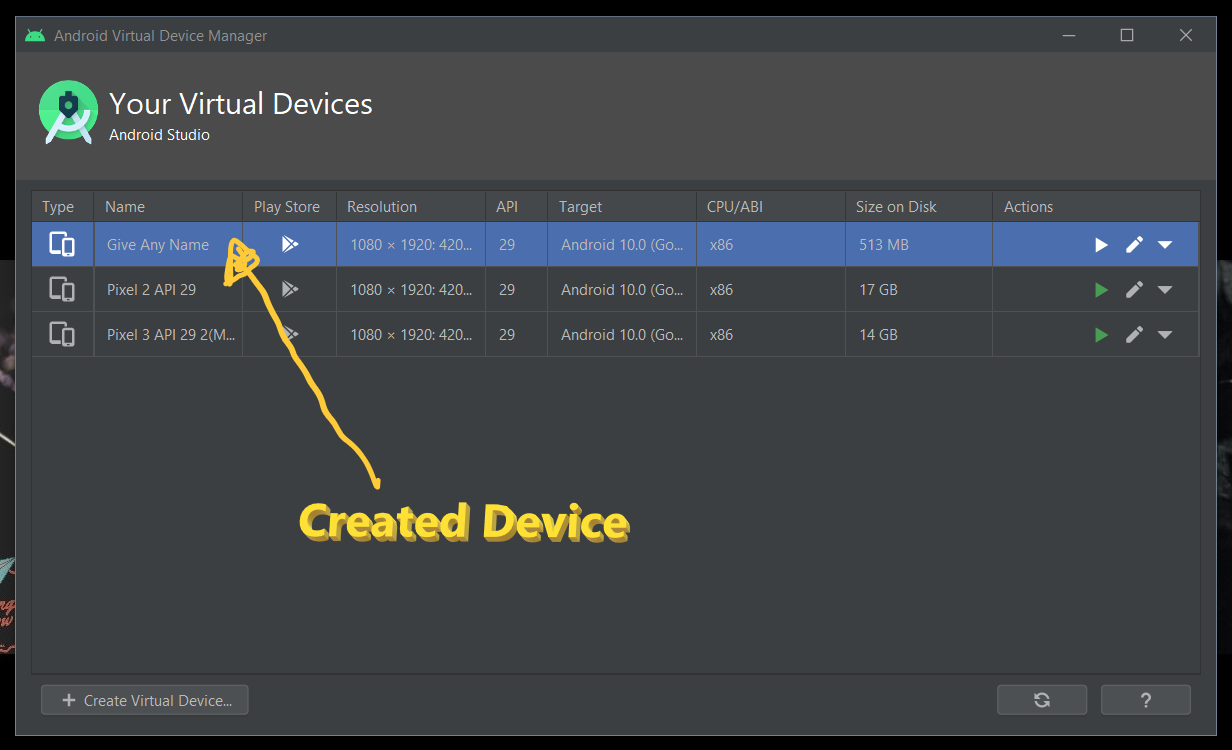
- Finish
Further settings
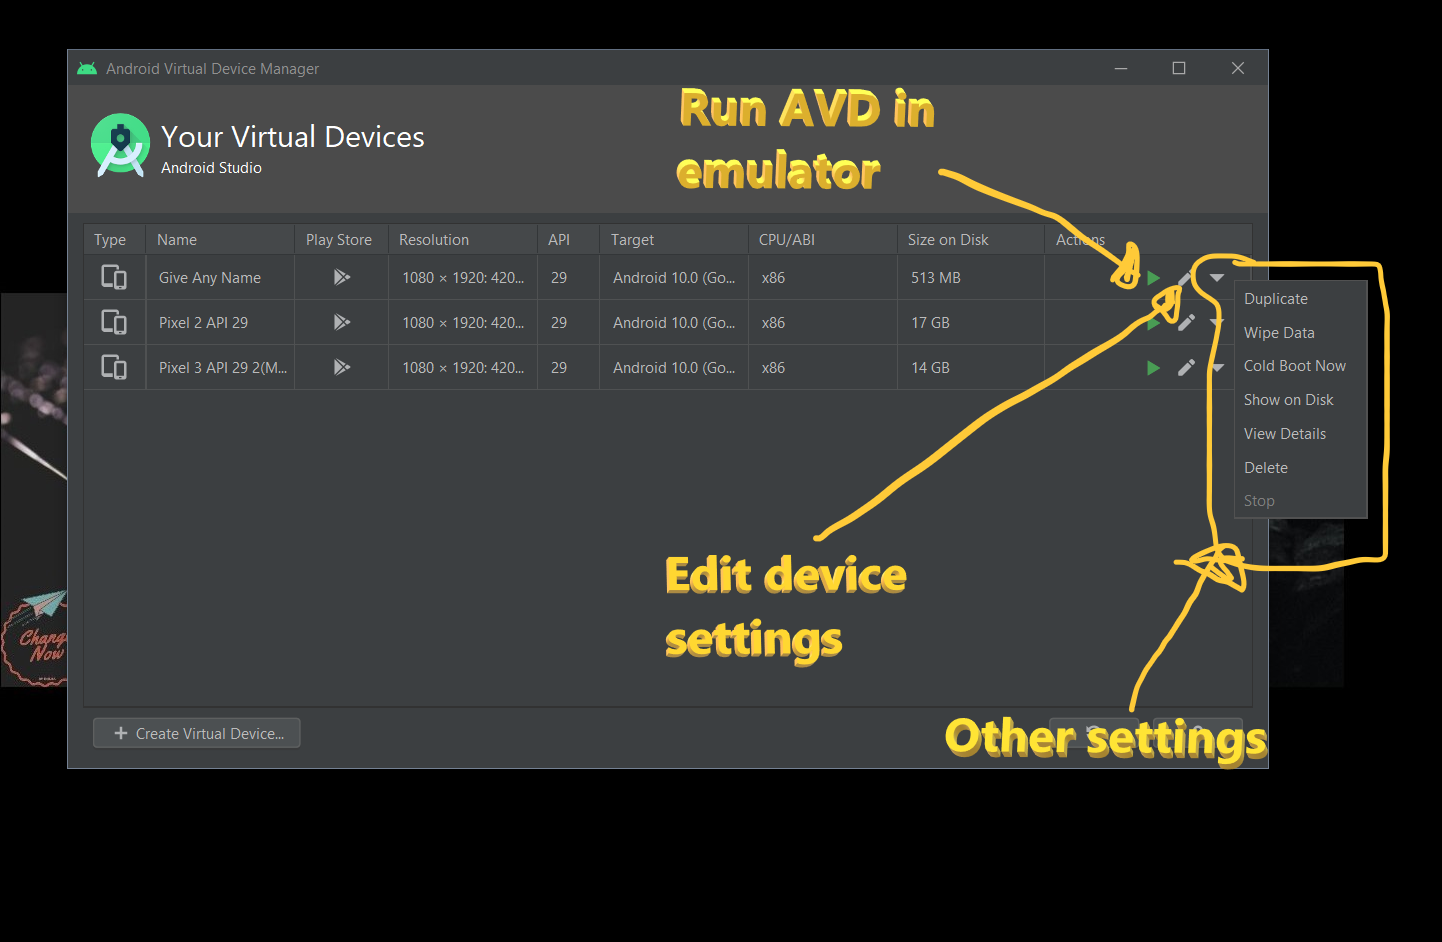
Under the Actions section
- Launch AVD in the emulator
- Edit AVD
- Other Settings
- Duplicate
- Duplicate the AVD
- Wipe Data
- Clear Data
- Cool Boot Now
- Show on Disc
- The location where data on your computer
- View Details
- Details of AVD
- Delete
- Delete AVD
- Stop
- Stop AVD when running in an emulator.
Video to create new AVD
An emulator is the easiest way to run your applications and debug.
"Change Can Happen Now"


No comments:
Post a Comment