

If you are a beginner to the coding world, you will hear this word from the seniors that they are telling this word very often.
Actually, what is this GitHub?
Sounds like a hub. Isn't it?
Yeah.. it's a hub... a community... where people share their projects with others and ask to collaborate.
Why GitHub?
Consider, you and your friend is working on a project and you are exchanging your changed code with a friend using a physical device or somehow and friend shares her/his changed code with you. Seems like it is a little bit easy.
But think there are more than two friends who are collaborating on the project. Then it will be a big problem. We don't know who changed the code and where is the change to be done. And need often communication and connection with each other. This could be a headache. If someplace missed the whole project will be crashed.
So as a solution they provide us with a platform like GitHub to manage and share the project. This is not the only platform but famous. There are other platforms as well as like GitLab, BitBucket. Feel free to use any.
But to use any of these platforms you must have knowledge of Git. There are few commands to remember, in order to work with git.
Background to Git
Ok... there are the most important two words you need to keep in mind.
- Remote (think of it as a cloud)
- Local (think of it as your machine)
Don't get confused with these two words. The below illustrator will give more details. Some are explained later. Here is you and your friend contributing to the same project.

We are sharing/exchanging our code between the local repository and remote repository.
Now, what is Repository😳. Repo is the short form of Repository. So repo is some kind of a folder that contains the working project. We have two repos. One is Remote Repository and another one is a Local Repository (Not understood, then look at the image😉).
Now let's see how to exchange the code between remote repo and local repo.
Initializing the repository...
Step 1
Step 2
Then you need to initialize the repo. It could be either a local or remote repo.
I will initialize the remote repo which is a little bit easier than local.
- Go to your profile
- Then select the `Repository` tab
- Select `New`

Step 3
Add details of repo like below.

Add details of repo like below.

Step 4
Now your remote repo should be like this.
Now your remote repo should be like this.

Step 5
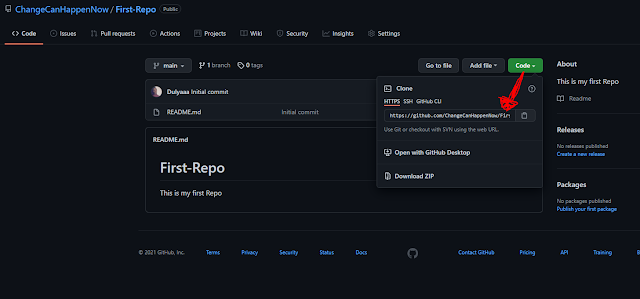
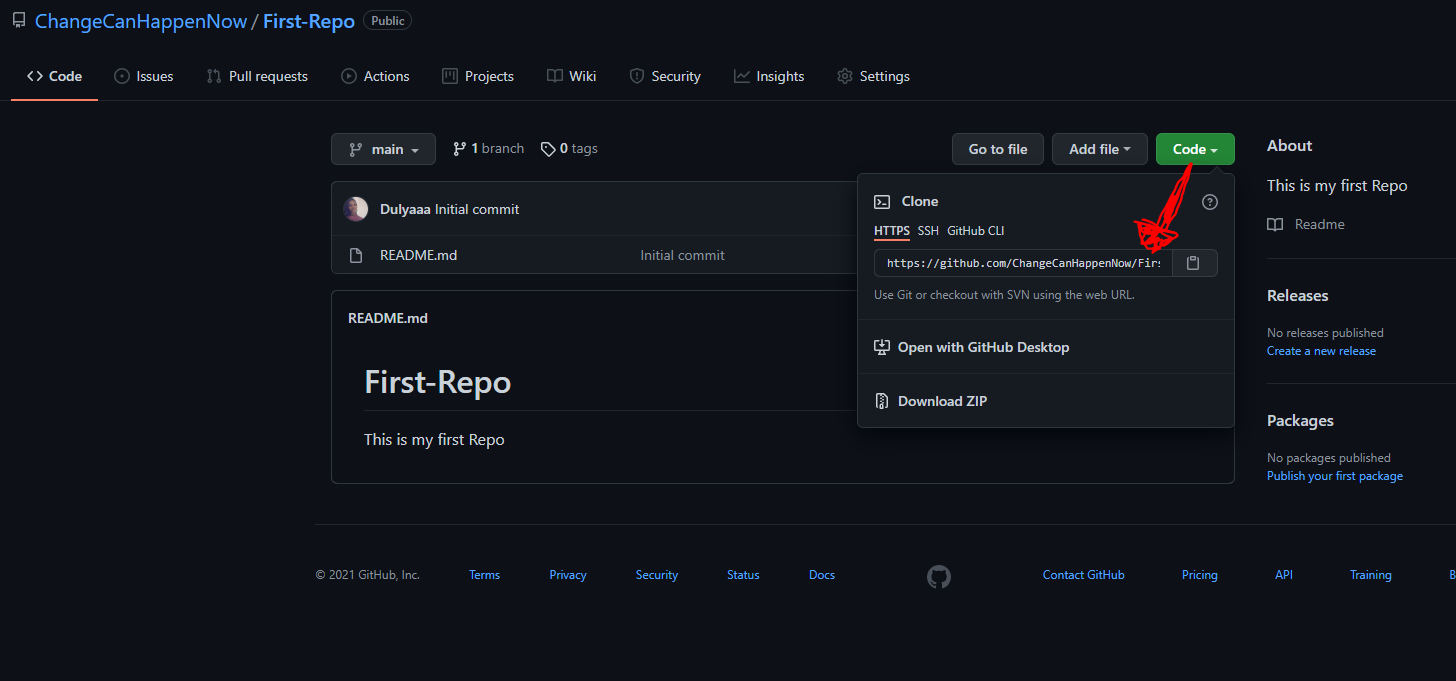
Then let's create a local repo from this. You can clone this project into your local machine by getting the cloning URL of the project.
From the Code tab, you can copy the clone URL.
Then let's create a local repo from this. You can clone this project into your local machine by getting the cloning URL of the project.
From the Code tab, you can copy the clone URL.
Step 6
Open a command prompt from where you would like to create the project. (Just go to the folder and give 'cmd' in folder navigation bar.)
Give below command in command prompt.
Open a command prompt from where you would like to create the project. (Just go to the folder and give 'cmd' in folder navigation bar.)
Give below command in command prompt.
$ git clone project_clone_url
Example: $ git clone https://github.com/ChangeCanHappenNow/First-Repo.git
$ git clone project_clone_url
Example:
$ git clone https://github.com/ChangeCanHappenNow/First-Repo.git
Step 7
Then the project will initiate in the local machine too. (You can see the folder with the name of Remote Repo and Readme.md file)
Then the project will initiate in the local machine too. (You can see the folder with the name of Remote Repo and Readme.md file)
Almost Done..!!🥳
Ok... now you have a repo locally and remotely.
Let's do some changes in the local repo and put them into the remote repo.
Changing & Exchanging the code...
Step 1
Open the Readme.md file in a notepad and edit and save it.
 |
Step 2
Now we need to add changes to the local repo and push the changes to remote repo.
Open the command prompt in a file location.
- First add the changes to commit
$ git add .

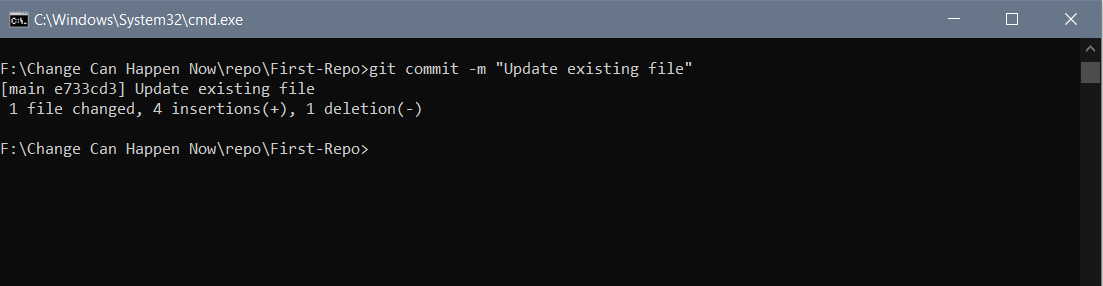
- Then commit to add the local repo
$ git commit -m "Add existing file"
- Push the code to remote repo
$ git push origin branch name

Go and check your GitHub repo. It's updated.✨
Continue Reading... Coming Soon😉


Feel free to add comments and ask questions. ��
ReplyDelete